
ガイドを書いて公開する
前提条件
- 仮想エージェントが有効組織内で。詳細については、担当のカスタマーサクセスマネージャーにお問い合わせください。 。
- ガイド用の AI Studio 権限。必要な権限の詳細については、以下を参照してください。 AI Studioの権限。
お先にどうぞガイドを作成するガイド作成に利用可能なオプションのいずれかを使用して、ガイドに指示を追加したり、既存の指示を編集したりすることができます。説明書タブ。
ガイドを作成または開く
- 管理をクリックします。
- AI Studioの下でクリックガイド。
- クリックメニュー>オーケストレーション> AIスタジオ>ガイド。
- 特定のガイドを検索するには、検索ボックスにガイドの名前を入力します。入力すると、一致するガイドが表示されます。
- ガイドを開くには、その名前をクリックします。
- 選択してください説明書タブ。
- の中で説明書タブをクリックして、自然言語で手順を追加または変更します。
ガイドの指示を書く
指示を書いてフォーマットするときは、次の基本的なガイドラインに従ってください。
- 単一のタスクまたは意図に焦点を当てるようにガイドを設計します。
- タスクをメインステップとサブステップに分割します。このタイプの構造化により、ステップ間のジャンプを要求したときに AI エージェントがコンテキストと参照を理解できるようになります。
- 各ステップに番号を付けます。
- 各メインステップに一意の名前を割り当てます。ステップとそのサブステップ内で何が起こるかを正確に説明する名前を選択します。
- インデントを使用すると、手順内の階層の種類を表すのに役立ちます。
- 他の主な手順を参照するには、角括弧を使用します。
- AI エージェントに言わせたい特定のフレーズを述べる場合は、引用符を使用します。
指示書の書き方に関する詳細なガイドラインについては、ガイド作成のベストプラクティス。
変数を追加する
- ガイドを作成するか、既存のガイドを開きます。
- 選択してください変数タブ。
- の中で変数タブ、ガイド変数を作成するガイドで使用する予定のもの。
- 選択してください説明書タブ。
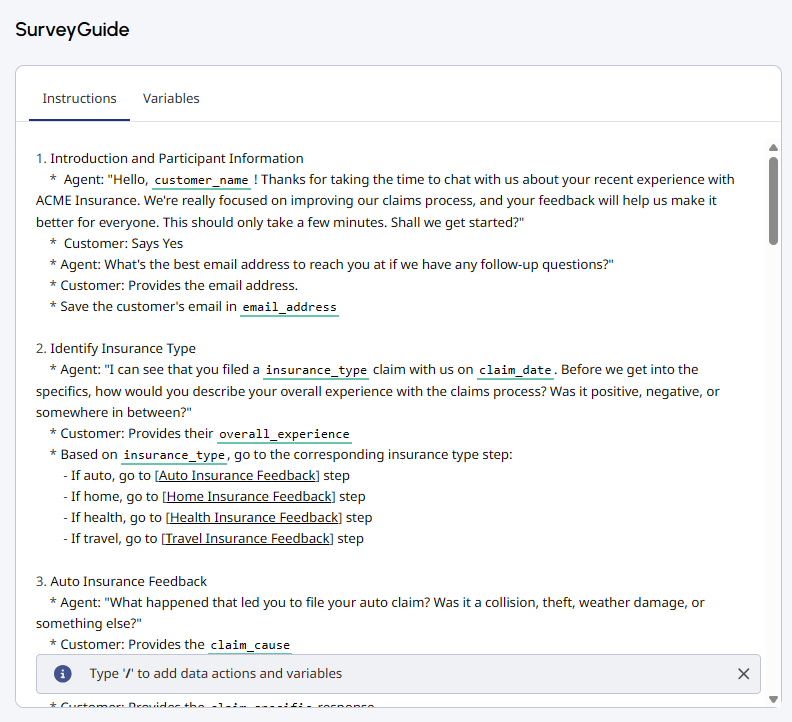
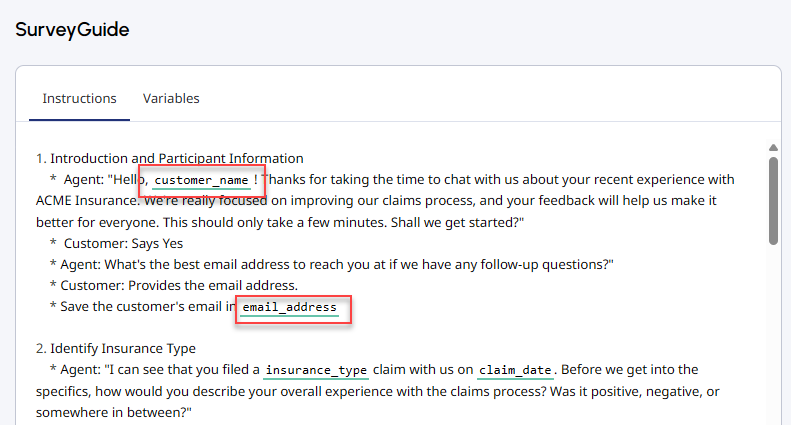
- の中で説明書タブで、変数を挿入する場所にカーソルを置き、「/」と入力します。ポップアップ ウィンドウに使用可能なすべての変数が表示されます。
- 必要な変数を選択します。
エディターは、ガイド内に存在する変数を緑の下線で強調表示します。
データアクションを追加する
以前に構成したデータ アクションをガイドに追加できます。カスタムデータアクションの作成の詳細については、以下を参照してください。統合用のカスタムアクションを作成する。
- ガイドを作成するか、既存のガイドを開きます。
- 選択してください説明書タブ。
- の中で説明書タブで、データアクションを挿入する場所にカーソルを置き、「/」と入力します。ポップアップ ウィンドウに利用可能なすべてのデータ アクションが表示されます。
- 必要なデータアクションを選択します。
エディターはガイド内に存在する変数を青い下線で強調表示します。ガイドでのデータアクションの使用に関する詳細については、以下を参照してください。データアクションを使用してガイドを外部サービスに接続する。

ガイドを保存して公開する
- 編集が終わったらクリックします保存ガイドを下書きとして保存します。
- クリック公開ガイドを公開します。
メモ:
- ガイドが下書きモードの間は、必要に応じてガイド変数を変更できます。ガイドを公開した後は、既存の変数の名前、タイプ、または可用性を変更することはできませんが、新しい変数を追加することはできます。
- 仮想エージェントが有効になっている Architect ボット フローにすでにリンクされているガイドを公開すると、フローは実行中に最新の公開済みガイドを呼び出すようにすぐに構成を更新します。
- 仮想エージェントのパフォーマンスは言語によって異なる場合があります。Genesys では、本番稼働前に希望の言語でテストすることを推奨しています。
ガイドを公開した後、「ガイドの呼び出し」アクションを使用して、Virtual Agent が有効になっている Architect ボット フローまたはデジタル ボット フローにガイドを接続できます。詳細については、ガイドを仮想エージェントフローに接続する。ガイドの複製または削除については、以下を参照してください。ガイドを複製または削除する。